Keeping your pet feeder clean is one of the most overlooked yet essential aspects of pet care. Many pet owners focus on nutrition, portion control, and feeding schedules but often neglect the hygiene of the feeding apparatus itself. Over time, food residue, bacteria, and mold can accumulate, posing health risks to your furry companions. A dirty feeder can lead to digestive issues, infections, or even long-term health problems. Understanding how to properly clean and maintain your pet’s feeder ensures their mealtime remains safe and enjoyable.
The type of feeder you use plays a significant role in how you should approach cleaning. Plastic feeders, for instance, are lightweight and affordable but can develop scratches that harbor bacteria. Stainless steel options, while more durable and resistant to bacterial growth, still require regular sanitization. Automatic feeders with electronic components demand extra care to avoid water damage during cleaning. Regardless of the material or design, establishing a consistent cleaning routine is crucial to prevent contamination and extend the lifespan of the feeder.
Daily maintenance is the first line of defense against grime buildup. After each meal, take a moment to wipe down the bowl or tray with a damp cloth to remove leftover food particles. If your pet eats wet food, this step becomes even more critical, as moisture accelerates bacterial growth. For dry food feeders, a quick rinse under warm water can suffice, but avoid using harsh detergents unless thoroughly rinsed afterward. Small habits like these go a long way in maintaining a hygienic feeding environment.
Deep cleaning should be performed at least once a week, depending on usage. Start by disassembling the feeder if it has removable parts. Soak the components in warm, soapy water for about 10-15 minutes to loosen dried food and debris. A soft brush or sponge can then be used to scrub away stubborn residue. Pay special attention to crevices where crumbs tend to hide. For stainless steel bowls, a mixture of baking soda and water works wonders for removing stains and odors without damaging the surface.
Sanitization is another key step that shouldn’t be skipped. After washing, soak the feeder in a diluted vinegar solution or use a pet-safe disinfectant to kill lingering bacteria. Rinse thoroughly with clean water to ensure no chemical traces remain. Some pet owners opt for dishwasher cleaning, but always check the manufacturer’s guidelines first, as high heat can warp plastic or damage electronic parts. Air-drying is preferable to using a towel, as cloth fibers can sometimes transfer contaminants back onto the surface.
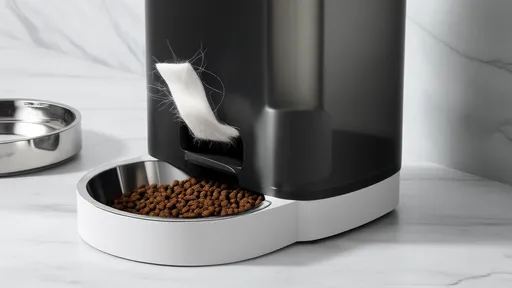
Automatic feeders require a more cautious approach. Unplug the device and remove any batteries before cleaning. Use a slightly damp cloth to wipe down the exterior and feeding tray, avoiding direct contact with electrical components. Compressed air can be helpful for blowing out crumbs from hard-to-reach areas. Never submerge the main unit in water, as this can cause irreversible damage. Instead, focus on keeping the food storage compartment and dispensing mechanism free from old food that could mold or clog the system.
Mold and mildew are common issues in poorly maintained feeders, especially in humid climates. If you notice a musty smell or black spots, act immediately. A solution of one part bleach to ten parts water can effectively eliminate mold, but ensure the feeder is rinsed thoroughly afterward. For persistent mold problems, consider replacing the feeder altogether, as some molds produce toxins that can’t be fully removed through cleaning. Prevention is always better than cure, so storing the feeder in a dry, well-ventilated area between uses is highly recommended.
The frequency of cleaning may need to increase under certain circumstances. Homes with multiple pets, households where pets drool excessively, or those using moist food should consider cleaning feeders more often. Similarly, pets with weakened immune systems or allergies benefit from near-sterile feeding conditions. Observing your pet’s health and behavior can provide clues—if they’re hesitating to eat or showing signs of stomach upset, a dirty feeder might be the culprit.
Choosing the right cleaning products is just as important as the cleaning process itself. Avoid abrasive cleaners or scented soaps that might leave behind harmful residues or deter pets from eating due to strong smells. There are numerous pet-specific cleaning solutions available that are formulated to be safe even if ingested in small amounts. When in doubt, simple dish soap and hot water remain a reliable choice for most feeder materials.
Beyond the feeder itself, don’t forget about the surrounding area. The floor or mat beneath the feeder collects spills and should be cleaned regularly. Elevated feeders or stands also accumulate dust and should be wiped down periodically. Maintaining cleanliness in the entire feeding zone prevents pests and creates a more pleasant dining experience for your pet. This holistic approach to feeder hygiene contributes significantly to your pet’s overall wellbeing.
Establishing a cleaning routine might seem tedious at first, but it quickly becomes second nature. Many pet owners find it helpful to schedule cleanings alongside other weekly chores. The peace of mind that comes with knowing your pet is eating from a clean surface is well worth the extra effort. Remember, a clean feeder isn’t just about appearances—it’s a fundamental part of responsible pet ownership that directly impacts your companion’s health and happiness.

By /Aug 6, 2025

By /Aug 6, 2025

By /Aug 6, 2025
By /Aug 6, 2025

By /Aug 6, 2025

By /Aug 6, 2025

By /Aug 6, 2025

By /Aug 6, 2025
By /Aug 6, 2025

By /Aug 6, 2025
By /Aug 6, 2025
By /Aug 6, 2025

By /Aug 6, 2025
By /Aug 6, 2025
By /Aug 6, 2025

By /Aug 6, 2025
By /Aug 6, 2025

By /Aug 6, 2025
By /Aug 6, 2025
By /Aug 6, 2025